


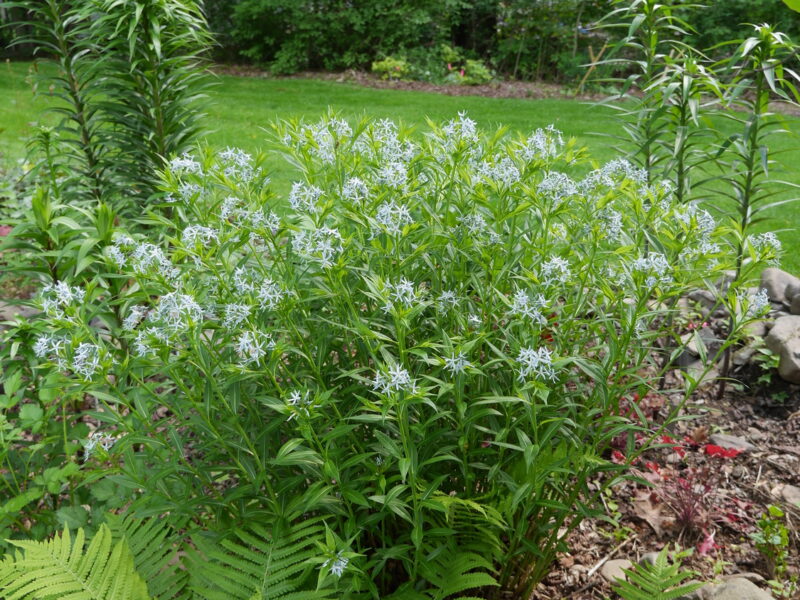
My first Amsonia, or eastern bluestar, was only about a foot in diameter. We divided it a few years later and moved it to a new home 20 feet away. Dividing the crown was challenging. ANDREW MESSINGER
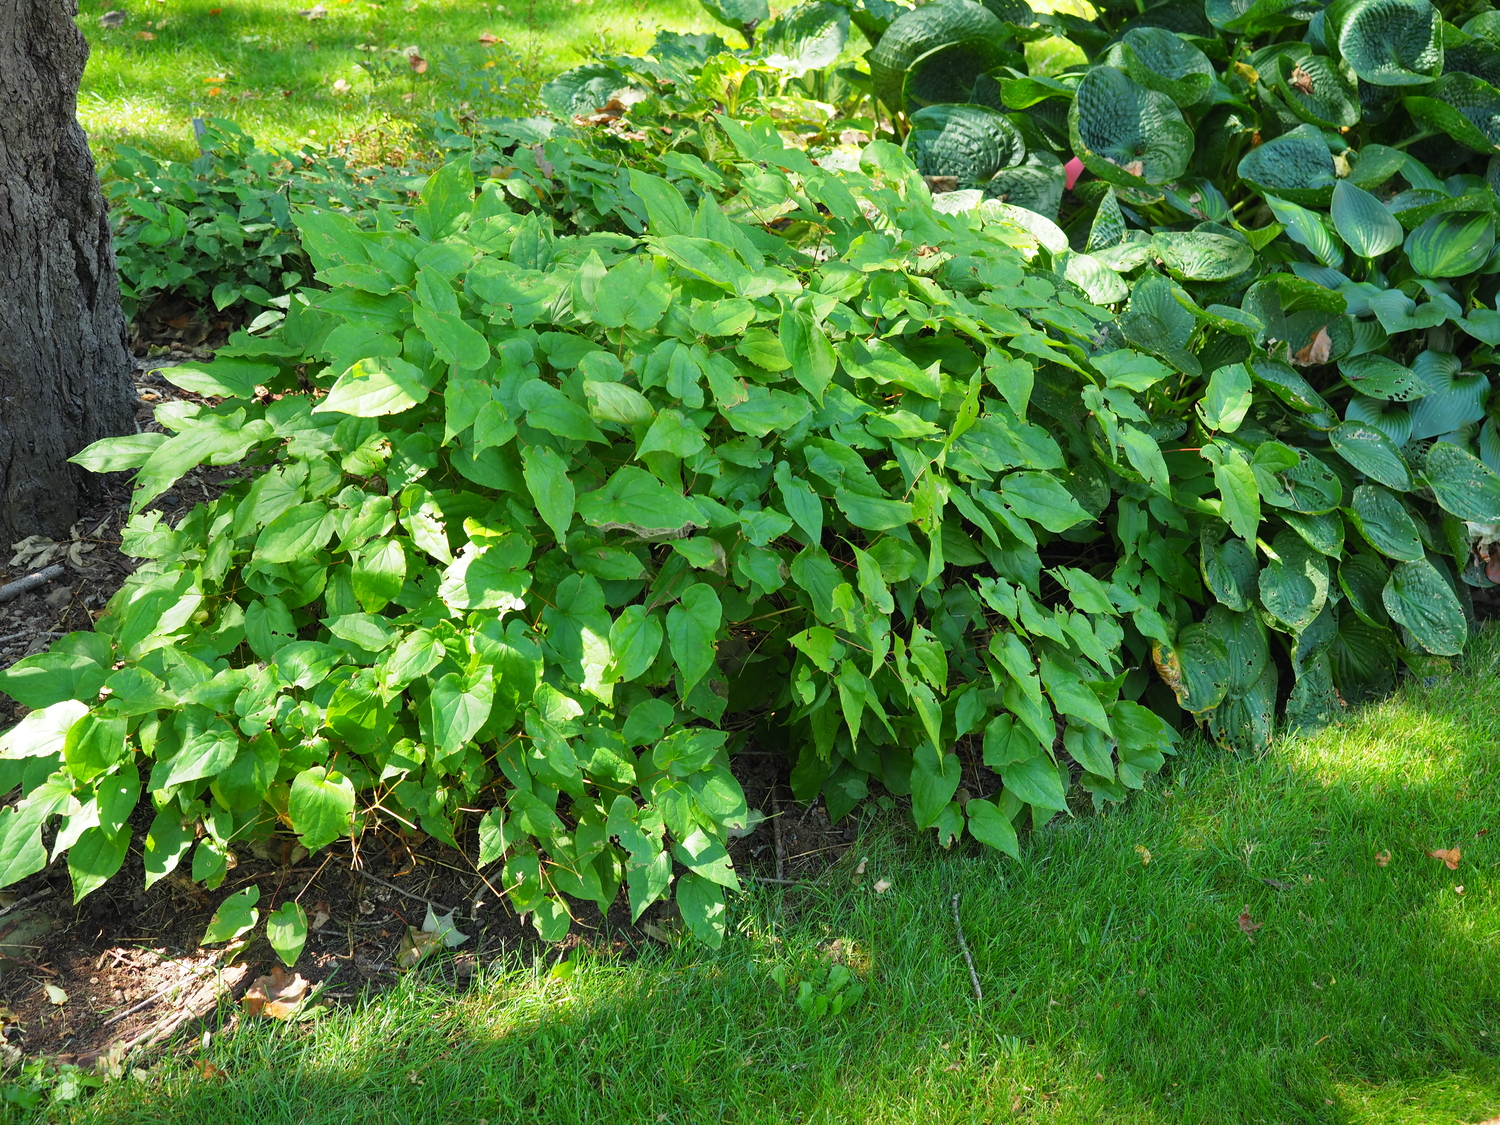
Epimedium "Red Queen" flowers in the spring and can be divided in the fall. Find a spot where the plant has natural "sections," reduce the foliage by one third, then dig the section. ANDREW MESSINGER
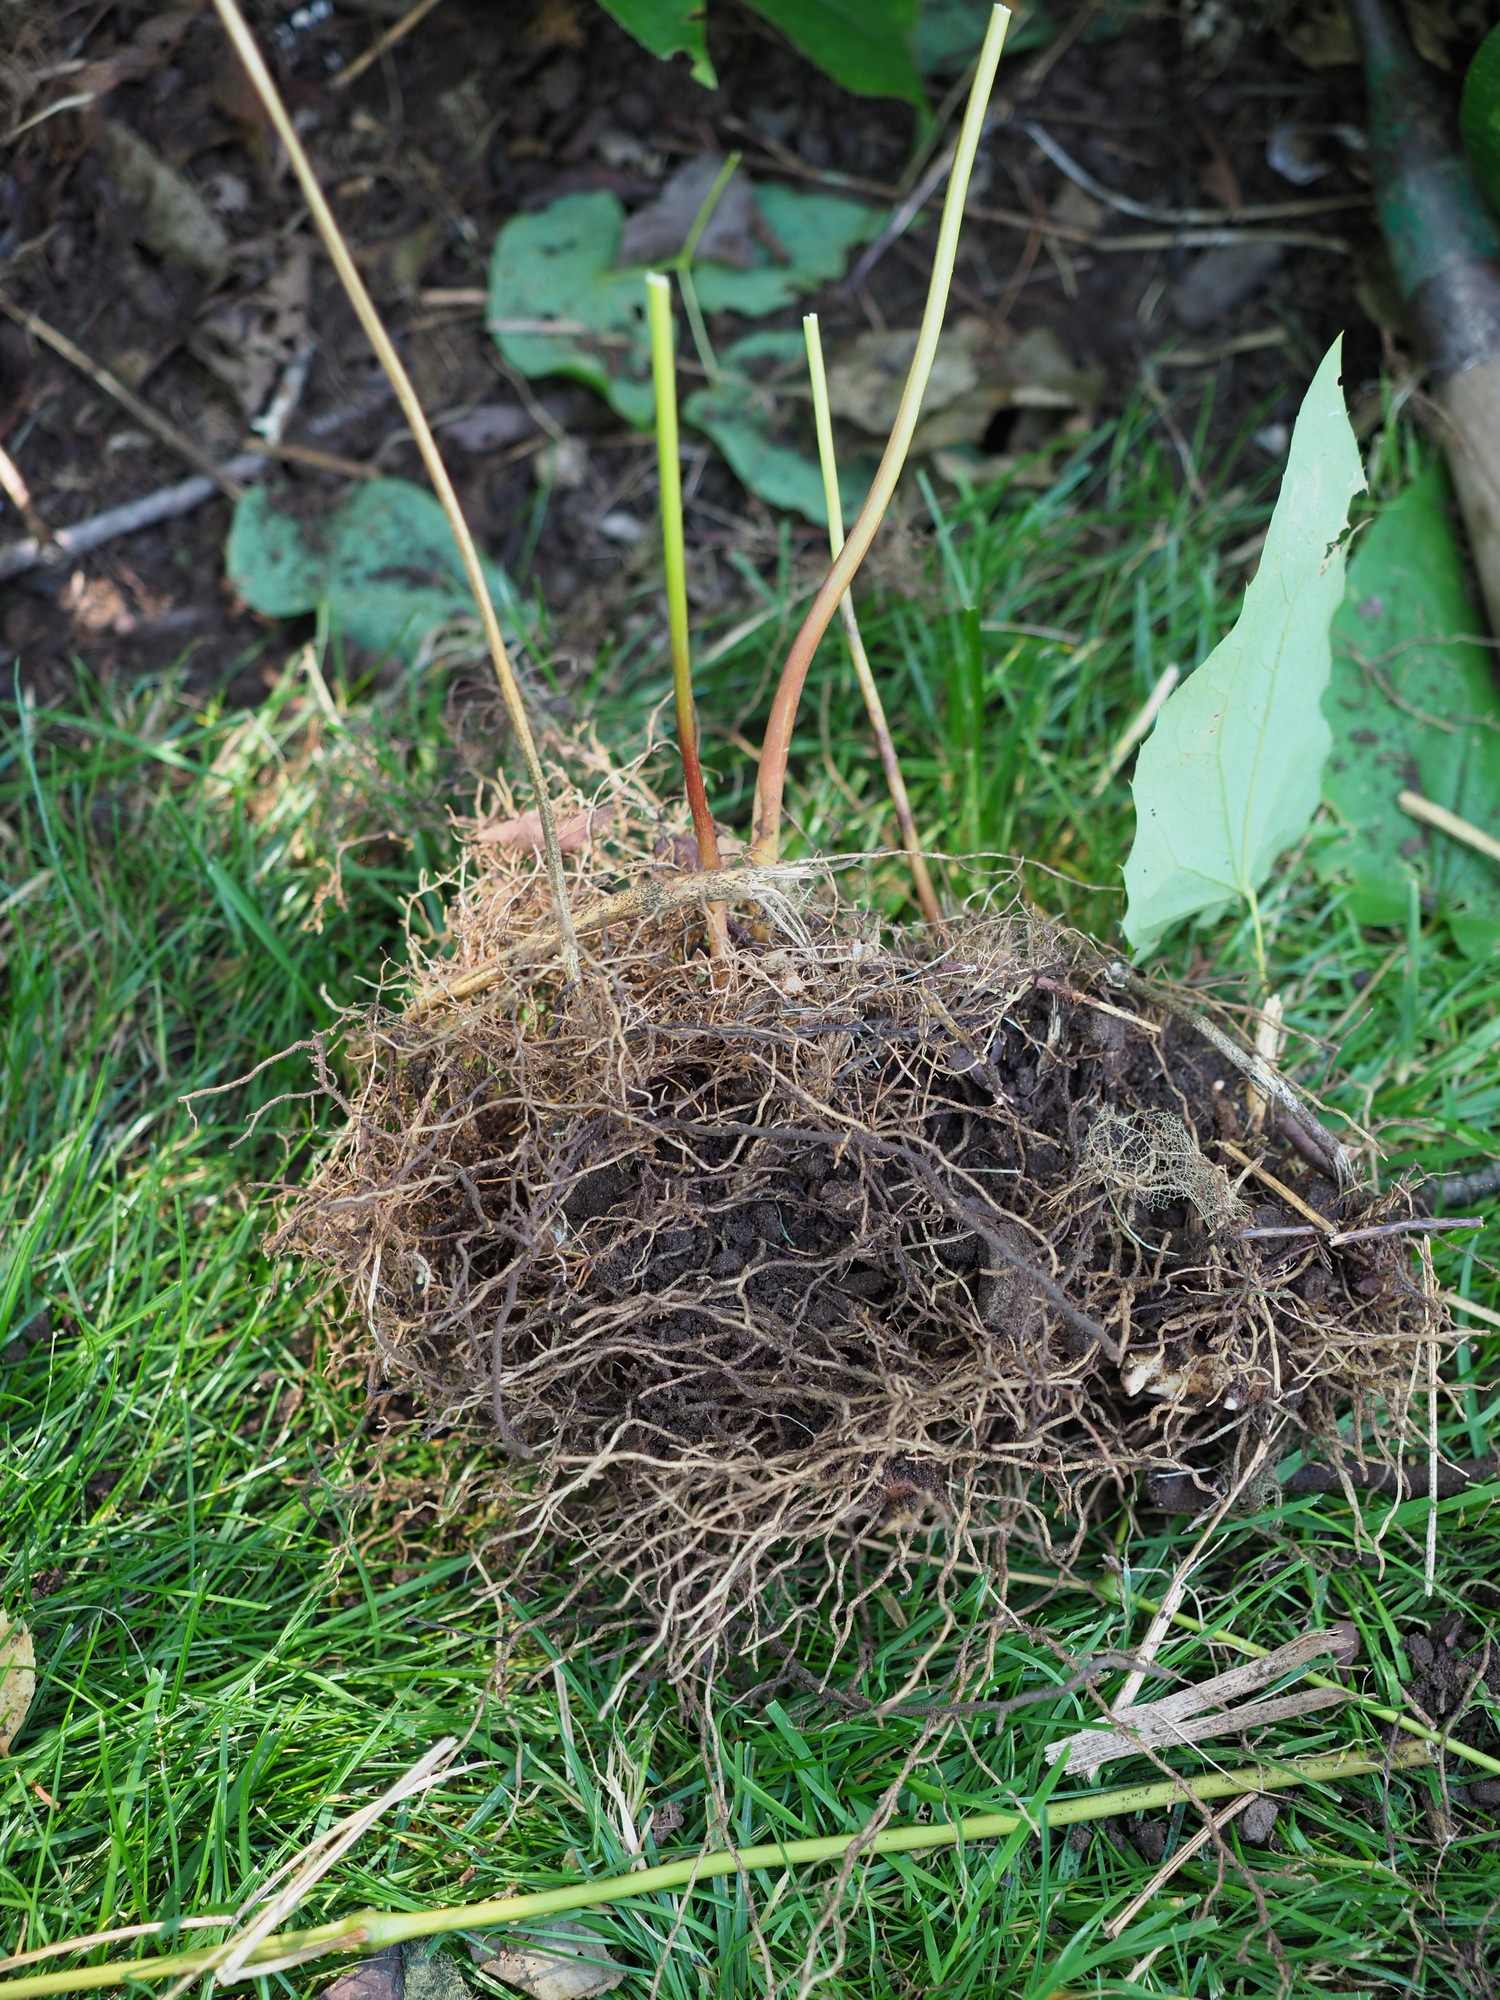
A divison of E. "Red Queen." The roots are thin but tenacious. This division will need to be planted into a good composty soil and kept watered for several weeks. It may take two years to reflower but in two years this division will be a foot in diameter. ANDREW MESSINGER

Many Hostas can be divided in late summer or in the spring. This division came off a 15-inch-diameter crown. If replanted within a few days (kept cool and out of the sun until then) the division will fill in and double in size in just one growing season. ANDREW MESSINGER
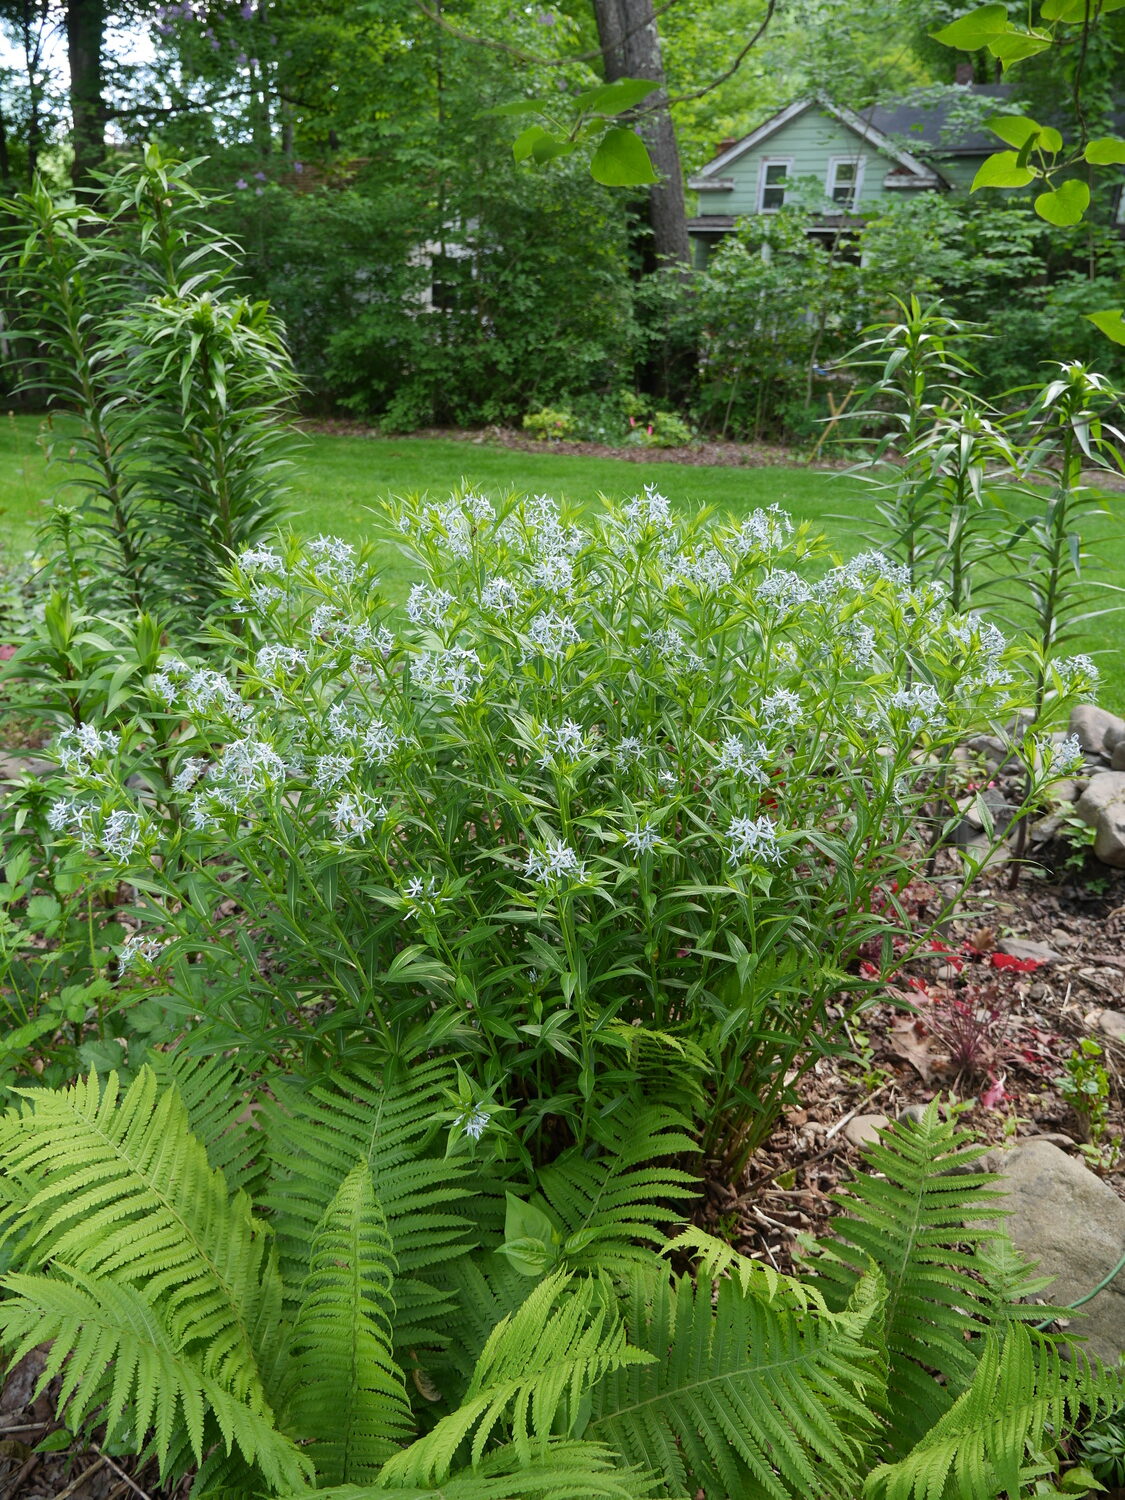
Moved to a location with part sun, the eastern bluestar, cut into four divisions, is now a summer hedge about 10 feet long and 2 to 4 feet tall. Later in the fall the foliage will drop and the plant will be cut back to the ground. ANDREW MESSINGER
The foliage has been trimmed by one third on this Kniphofia plant. Only a small section of the 15-inch-diameter plant was reduced prior to division and transplanting. ANDREW MESSINGER
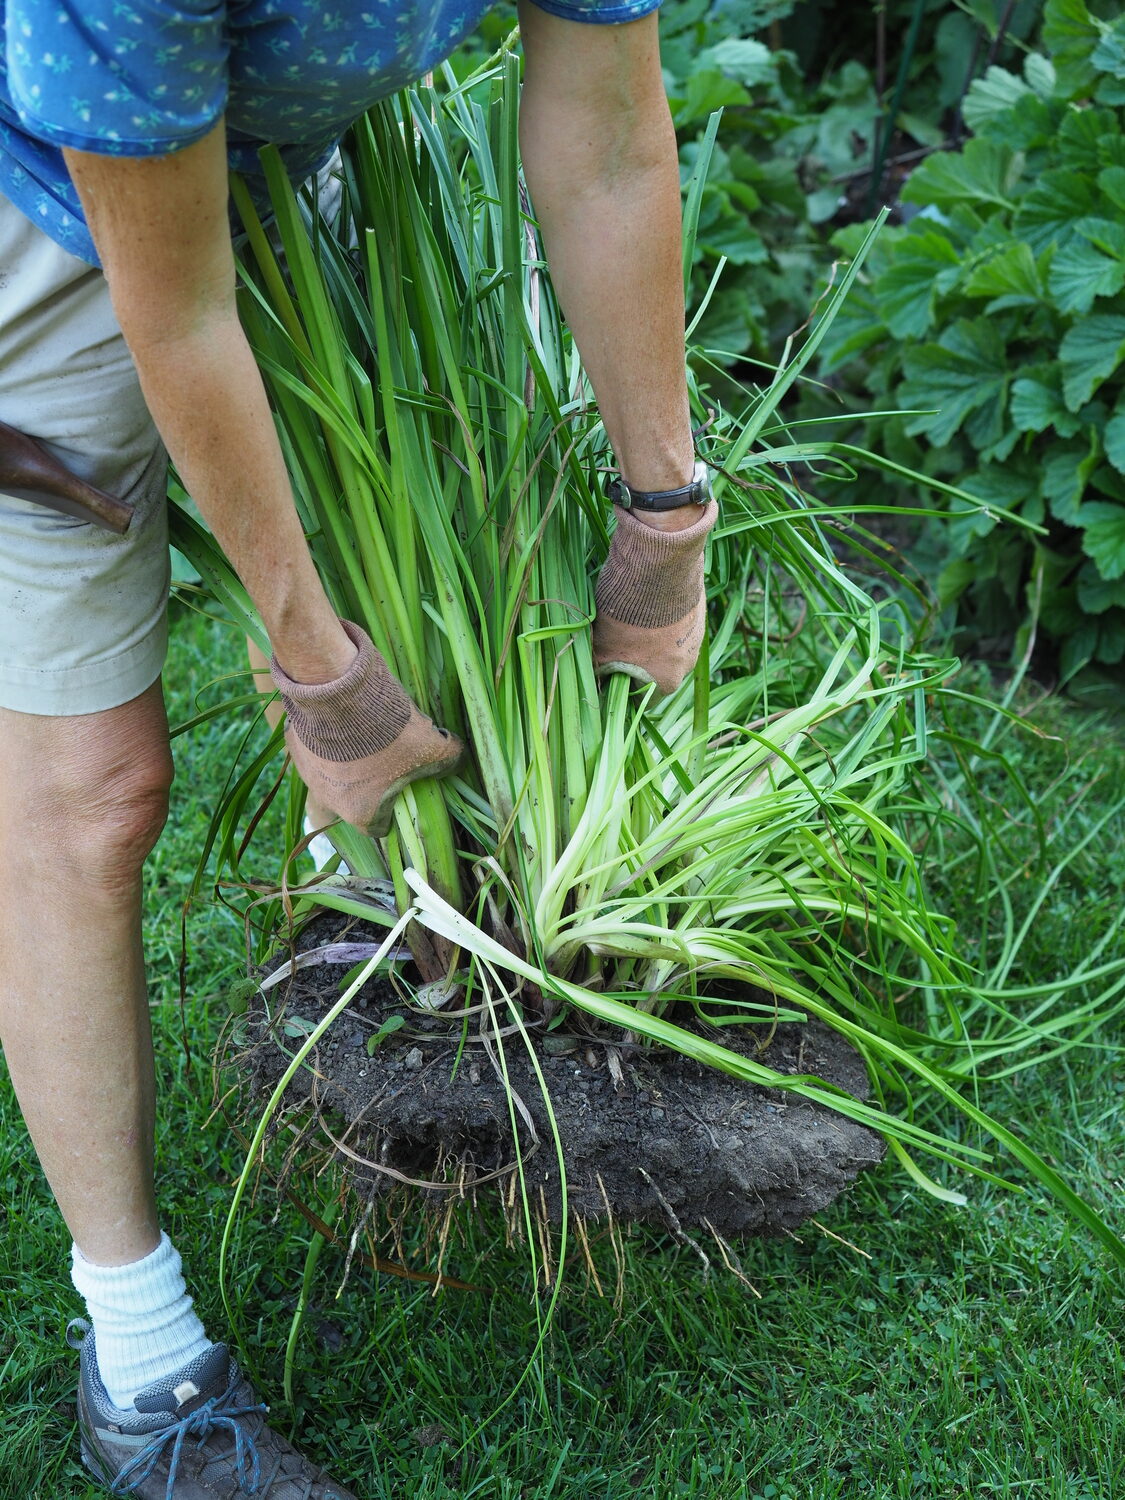
The entire original clump of Kniphofia planted several years ago was removed from the bed prior to a division being taken. ANDREW MESSINGER
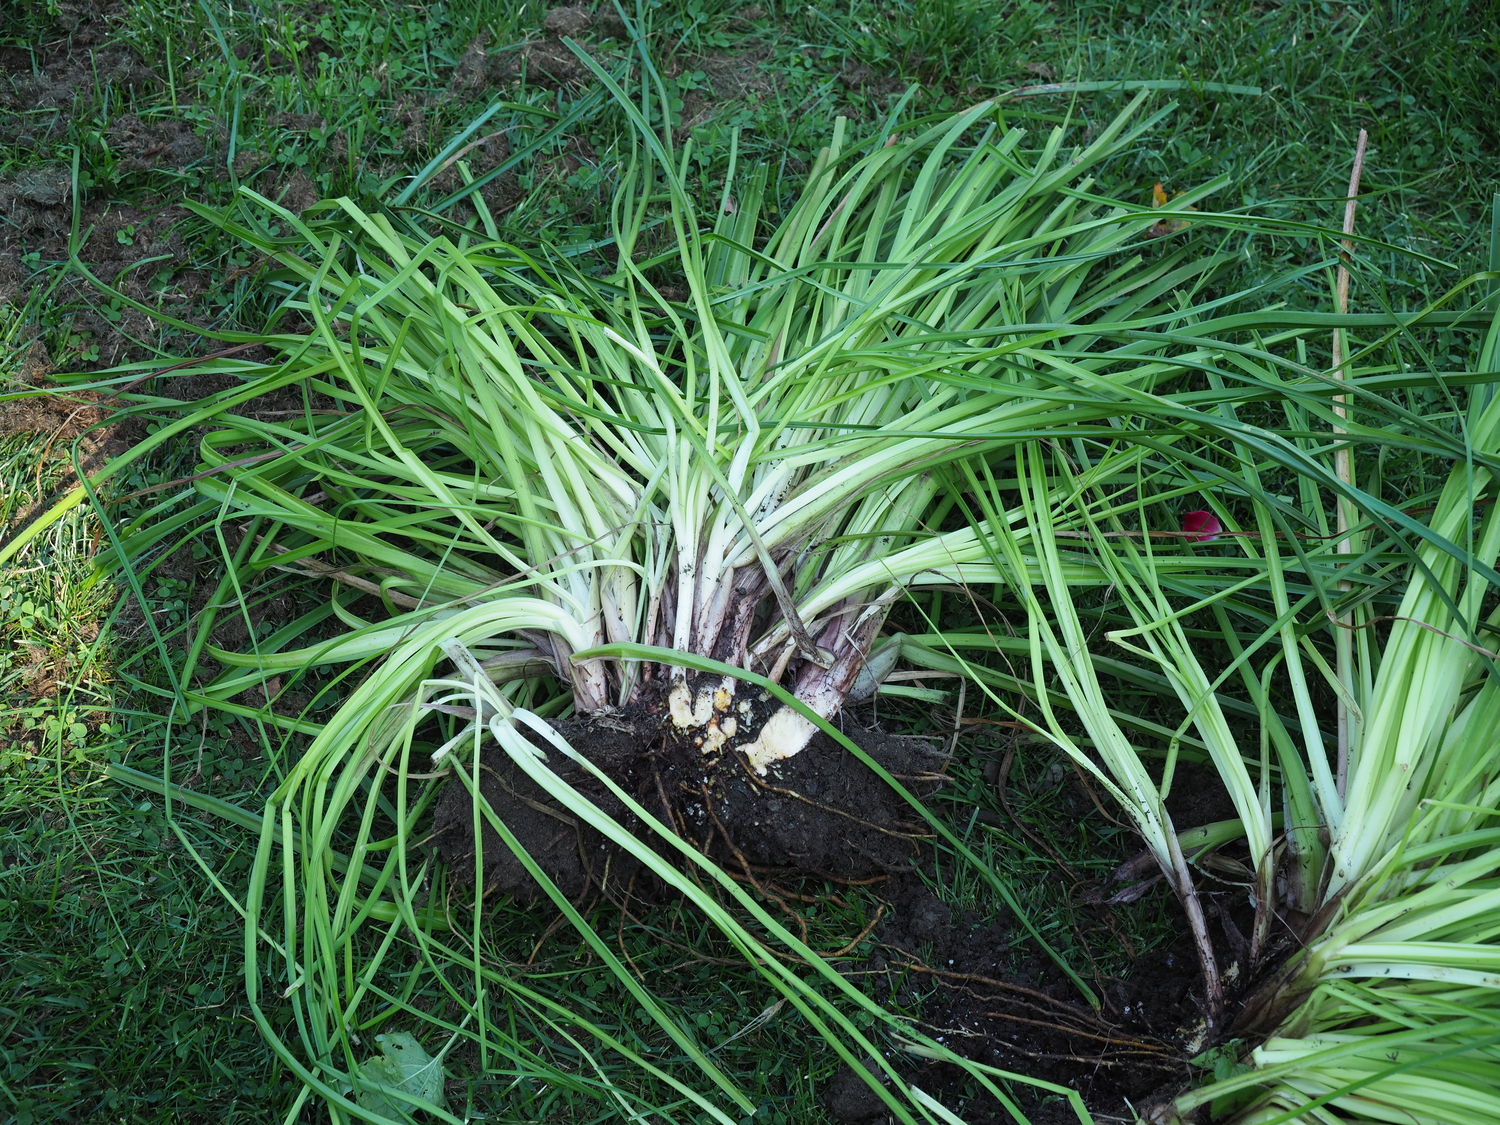
A section of the Kniphofia crown divided from the parent crown. Even this division could have been divided two more times. Can you see the spots where the additional cuts would be made in the crown? One left of center and one right of center. ANDREW MESSINGER

Last week I went over some of the basics on how to divide several garden perennials. This practice can be used to rejuvenate older plants like iris and peonies that have stopped flowering. Simply dividing the old clumps usually results in flowering plants the following year or, at worst, two years after division.
I also promised to review one more “easy” perennial that can be divided at this time of the year, then on to some challenging varieties.
Hostas are the last one I’ll review from the easy list. But don’t think that all Hostas are the same, grow the same and react the same to being divided. The more common varieties are indeed easy. However, you’ll find that the more expensive and more rare and unusual Hostas may take years before they get to a size that makes them divisible, and once divided they reestablish more slowly. Definitely things to consider well into the fall before you decide to dig.
Hostas will retain their foliage well into the fall, tattered as it may be. Before a Hosta can be successfully divided, it needs to have the foliage reduced, but not eliminated.
This allows the plant to continue the process of photosynthesis, and at this time of the year that also supports new root growth. New root growth is critical with divided plants as the roots anchor the plant should there be a winter “heave,” and the roots supply the rest of the plant with water as well as dissolved nutrients for continued growth.
Hosta can also be divided early in the spring, after the danger of frost and when you see pinkish tips emerging. No foliage to be concerned about, and all you have to do is dig the clump (and divide it) or a section and replant in the new location
Give your division project some thought before you dig. Consider the size of the target plant as some Hostas can be 2 feet or more in diameter and that can yield one division off the side or multiple divisions if you want to remove the parent plant and end up with many more “clones.” Yes, this is actually cloning — the division you replant will be an exact duplicate of the parent.
Using your straight spade, either square out the smaller section that you want to transplant or the entire target plant. Reduce the foliage on the section you want to divide so only about half is left. Know where you’re going to put the division or who you’ll give it to since Hostas won’t appreciate being out of the soil for more than a day. If it’s only a small piece you’re transplanting you can even use your hori hori knife for everything but digging the new hole.
The divisions you’ve made should be planted into holes as large or larger than the division you’re planting, using compost as backfill. Remember that the top or crown of the plant you’ve transplanted should be at the same level and depth as where it came from. Planting too deep can result in the crown rotting. After you’re done, water in well.
There are two types of phlox that can be divided: The creeping phlox, or Phlox subulata, and the tall garden phlox, Phlox paniculata.
The creeping phlox can also be propagated by rooting tip cuttings, but division is quicker with better results.
If you have a large clump of P. subulata, simply cut back the foliage in the area you want to divide, leaving an inch or two of growth. Using a small hand trowel or your hori hori, make cuts straight into the ground with the goal being divisions of 3 to 5 inches on a side or in diameter. Transplant these sections to the new location in a similar, well-drained soil and water in. Water every three days or so for about a month. Fill in the gaps with compost and fill the original hole with compost so the parent plant will fill in again. The new plants may flower as soon as next spring but certainly the year after.
The tall phlox are a bit different. Wait until flowering is over and find the largest clumps to divide. Cut the stems in the division area to a few inches. With your spade or knife, make cuts into the ground of about 4 to 6 inches on a side. Lift the divisions and install them in planting holes several inches larger than the division. Plant at the original depth with the top of the crown at the same soil level. Backfill with compost, tag and water in. Water weekly for about six weeks unless there’s rain.
Another method that will yield hundreds of new plants is to use a bulb planter. Cut the stems down to one inch then push the blade of the bulb planter into the crown at any point where there’s stem stubs. Push the bulb planter as far into the ground as you can. This severs the roots, and next spring these severed roots will each throw up new shoots. In the spring as the shoots appear, dig them up and transplant to a holding area. Each transplanted shoot will result in a larger transplantable phlox identical to its parent that can be moved to the garden late next summer.
Just about all the Thalictrums can be divided now. They can form 1-foot crowns to much larger ones. Look for division spots within the crown where you can dig a section with a few stems that are 6 inches or larger around. Use your spade to dig the section as the roots may be deep and you want as complete a division as you can get. Transplant as with any of the others we’ve been going over and water weekly for about a month. You may get flowering plants next year but keep in mind that varieties like the yellow Thalictrum flavum will have smaller crowns yielding fewer divisions.
Epimediums cover a number of species, some of which develop larger crowns and some very small crowns. The roots are fine but numerous and tenacious so digging needs to be slow and careful. Make sure the area is well watered before beginning work. A larger variety like E. “Red Queen” can be divided every couple of years while the smaller E. “Peachie” will only be divisible every third year or so. Remember that Epimediums are woodland plants and prefer dappled, high shade in a woodland setting. They prefer highly organic soils but don’t want to be constantly wet or excessively dry. My collection seems to be doing very well under an old apple tree.
As these plants do tend to hold their foliage well into late summer and early fall or later, you’ll need to thin out the foliage of the section to be transplanted. But since the plants continue to grow into the fall, some foliage must remain. It’s also critical not to let the transplants dry out this fall so water every three days or so unless we get rain. Divisions are the same as with many of the other plants described, but the plants can be a bit “dainty” so a knife or hand trowel would be the tool of choice. Dig your holes wider than the transplanted section by several inches and backfill with compost, which will retain moisture needed by the new roots.
For a challenge try dividing and transplanting Amsonia tabermontana, also known as the eastern bluestar. I was totally unfamiliar with this plant when we added it to the garden in 2007. In 2015 I decided to divide it and move the parent plant to a new location. The plant flowers in early June with starry light-blue flowers then develops into a small green bush 2 to 3 feet tall. It makes a nice summer hedge that can be shaped and hides anything behind it very well.
The crown of this Amsonia can be hard as a rock and difficult to slice, cut and divide. Later in September, using a sharp, straight spade, push on the spade into the crown. It will take some force, and the resistance may surprise you. Keep at it. Divisions that are 9 to 12 inches square can be planted 12 to 15 inches apart into holes slightly larger than the division. Backfill as needed and water every few days for about a month. New shoots emerge slowly and late in the spring, but your plants will emerge and you’ll get some flowering next spring. The small elliptical leaves will develop a tight and dense plant that will look and act like an evergreen — until we get a freeze. At that point it will show its true perennialness as the plant dies back to the ground. Remember, it reemerges as a totally new plant — a true perennial — late in the spring.
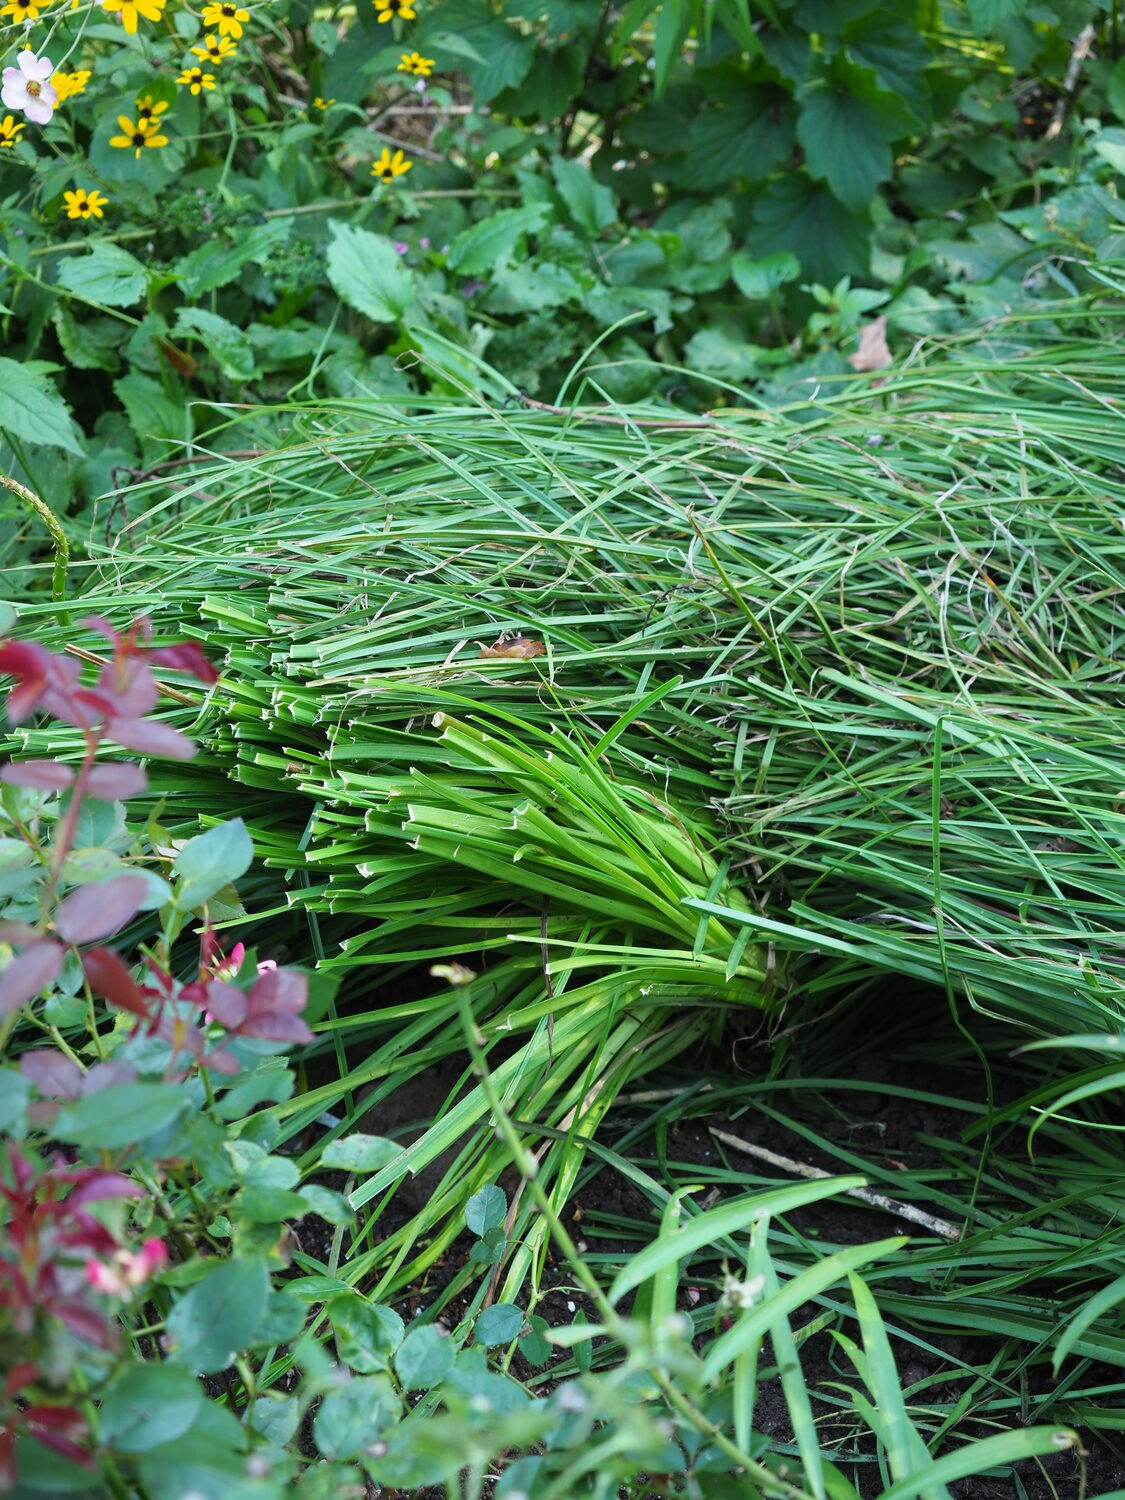
It seems to have been a banner summer for Kniphofia, the torch lily. I found the plants became so full that they began to crowd nearby plants so dividing and thinning the planting was in order. First the foliage was cut to about two-thirds of its summer length then shoot divisions were identified before digging and separating them.
I planted four 3-inch pots of K. “Joker’s Wild” in 2022. In an amended soil, the plants took off and this summer really did their thing with scores of flower spikes on plants that have gone from 4 inches in diameter to crowns that are now a foot or more in diameter. Time to divide. The parent plants were quite obvious, but large, with long green strap-like foliage.
Each plant could have been divided four times but instead we dug one plant and made a ¼ division and put the parent back into the ground. The slicing of the crown left some exposed portions so these were allowed to dry before the division was replanted and the row expanded a bit further. Prior to the dividing, the foliage was reduced by a third, and before replanting, by another third. This will allow the roots to continue to grow as well as the plant.
So there you have it. In a day’s work we created 50 new plants, most of which have been given away. Remember as a general rule spring-blooming perennials are divided later in the season and summer and fall-blooming varieties are divided in the spring as they first emerge. And of course there are exceptions. Get out and divide — it’s time. Keep growing.
More Posts from Andrew Messinger


