


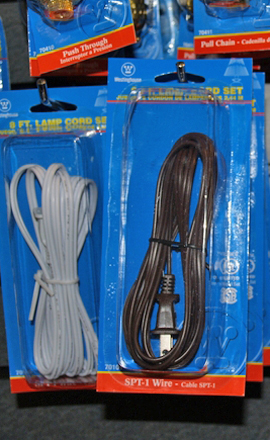
Wires come with various color, insulated wire.
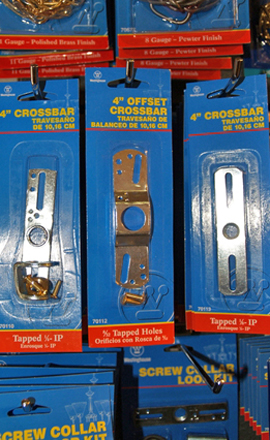
Crossbars.
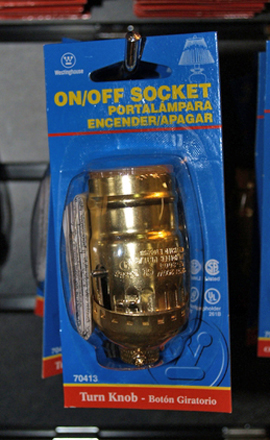
Lamp socket replacement.

Whether it’s rewiring grandma’s favorite antique lamp or creating a kitschy original light source, wiring a lamp can be fun and easy for those who are knowledgeable and prepared. For some, making a lamp out of a unique object or rewiring an old but broken treasure from a flea market or garage sale can also switch on a bright new hobby.
But there are dangers for the novice do-it-yourselfer, so be sure to come at this project fully informed about the safe and correct ways to complete the task.
Above all, rewiring a lamp needs to be done safely. A bad wiring job can result in fire, electrocution or even death. Rewiring a lamp is no project for the foolhardy or careless crafter.
Michael T. Velys, general manager of REVCO Electrical Supply of Southampton, advises extreme caution for those looking to rewire a lamp.
“We sell the parts to rewire a lamp, but even we won’t do the repairs,” Mr. Velys said. “My fear is that if we were to do the installation and there’s a problem, it could come back to us as a liability issue, and for that reason we don’t do it.”
Mr. Velys noted that those looking to rewire a lamp should purchase only products that are certified by Underwriter Laboratories (UL), which is a privately owned and operated, U.S.-based, independent, third party product safety testing and certification organization. According to Mr. Velys, the UL logo should be somewhere on the package of the items that are needed.
It’s also a good idea to take the lamp that is going to be rewired to an electrical supplier, where they can explain what products are needed for the project. And, as with any home repair project, the local expert is an ally.
For those who are up to the task, it’s a good idea to completely rework the entire electrical system of the lamp. Don’t take chances trying to save a few dollars. The cost for all the materials needed is around $20 to $30.
Most electrical suppliers, including big-box stores like Home Depot and Lowe’s, also carry a variety of replaceable lamp parts. Tools needed for this project are wire cutters, a wire stripper, needle-nose pliers and a flat-blade screwdriver.
To rewire a lamp, first clean the lamp thoroughly and replace anything that is broken. Before starting the rewiring process, remove the light bulb, shade and shade holding bracket or harp to avoid damaging them and to provide a better view of the work.
Next, cut the old cord on the lamp 2 or 3 inches from the base of the lamp. Now, cut the new wire to the desired length, considering the length of the lamp, where it will be placed and the wall socket it will be plugged into. Wire cutters are best for these jobs, but scissors will do.
Most lamp cords have two strands of wire. Each is covered with insulation which needs to be stripped off at the ends. In order to strip the wire, these two strands first need to be separated.
Use a utility knife to split the new cord about 4 inches. Repeat this process on the other end of the cord, unless the plug is already attached, which is a wonderful time saver and safety option.
Remove about a half-inch of insulation from the end of each wire with a wire stripper. A razor blade can be used, carefully, but a wire stripper is much safer and far more accurate.
Now, detach the bulb socket and switch at the top of the lamp. Again, it’s a good idea to replace the socket as well as the cord.
There may be fabric (often felt) covering the lamp base. This needs to be removed as well.
Next, tie or tape the new the new cord onto the end of the old cord at the top of the lamp.
Now, remove the old cord by tugging at it from the base and simultaneously pulling the new cord through. Remove electrical tape and discard the old wire and any fixtures that need to be replaced.
If there is resistance while trying to pull the cord through, the lamp might need to be disassembled, which would mean loosening or possibly completely taking apart the lamp’s components.
A tip: If the lamp has to be completely disassembled, place all the parts down in the order you take them off, marking each piece if necessary, because everything must be put back in the reverse order.
It’s likely that a nut holds the lamp’s components together near the base. Loosen this nut.
At this point, all the lamp’s components will become loose, so if there is glass involved, be careful. Try again to remove the old cord and thread the new cord through the lamp stem.
Once this is done, detach the old wires on the socket, or replace the socket and then attach the new wires. Twist the fringed wire in a clockwise direction.
Use a pair of needle-nose pliers to shape each stripped end into the shape of a hook. Lamp cord wire is fairly flexible, so fingers can do the job as well.
Hook the wires onto the socket terminals and tighten them with a screwdriver, being careful to tuck in the ends.
.
Now, place the socket shell back in the lamp and pull the cord taut from the base. Reattach the socket shell, and tighten the nut at the base and any other connections at the base of the lamp. If there’s a switch, reinstall it. Or better yet, replace that.
The final step is to connect the plug if there isn’t one already attached to the replacement cord. Many stores carry easy snap-on plugs.
Now the lamp is ready to be plugged in and turned on.
If the lamp doesn’t work, unplug it (a crucial step!) and use the screwdriver to slightly lift up the tab in the light bulb socket, which can flatten and impede the connection to the bulb.
This description of how to rewire a lamp is meant to illustrate how simple the process is and that it is doable. But anyone tackling this project should check with an expert, and also utilize “how to” websites, which have wonderful diagrams and more detailed instructions.
Safety is key with electrical jobs. Searching as many sources as possible will truly shine a light on this lamp-rewiring project.
T
ools needed for this project are: wire cutters, a wire stripper, needle-nose pliers and a flat-blade screwdriver.
More Posts from 


