


OLYMPUS DIGITAL CAMERA

OLYMPUS DIGITAL CAMERA
OLYMPUS DIGITAL CAMERA
OLYMPUS DIGITAL CAMERA
OLYMPUS DIGITAL CAMERA

Toolin’ Around is adding a new feature to this do-it-yourself column. For each project Toolin’ Around suggests, there will now be an accompanying scale for difficulty and project risk, which will translate to the amount of damage that could be done if the project goes awry.
Each scale is based on one through 10, with 10 being the most difficult and/or risky. The scale will include factors such as physical effort and precision of work. Project risk is similar to the difficulty scale with 10 being an extremely risky project.
Changing a light bulb would be a one on the difficulty scale as well as one on the risk factor scale. Rewiring an entire house would rate as a 10 on both the difficulty and risk scales.
A factor of 11 on either of these scales would constitute calling a professional to fix the damage and do the job right. That determination, which wouldn’t qualify as a do-it-yourself project, we’ll leave up to those of you who are a little more advanced than the average Joe.
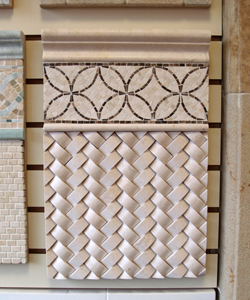
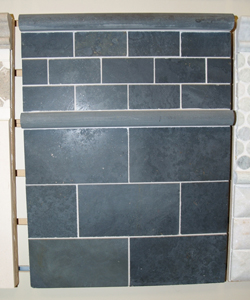
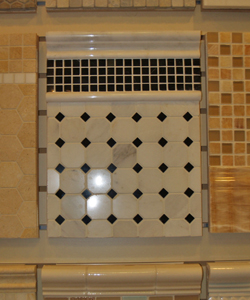
So, let’s tackle the next project—a simple ceramic tile backsplash. Putting up tiles is relatively easy, but the job calls for a fair amount of precision to make the work look nice so on the Toolin’ Around difficulty scale this project is a five. Since tiles can be easily removed with a scraper and washed clean of adhesive with water, the risk factor is about a three.
Even the most mundane of kitchens can be spruced up with a ceramic tile backsplash. Standard kitchen backsplashes are generally 18 inches high and roughly 25 to 30 feet long.
The baseline cost for a do-it-yourself ceramic backsplash is between $300 and $500, which includes about $250 to $300 worth of ceramic tiles. The cost for a ceramic backsplash can be driven up sharply by the quality of the tiles and extra bits of business such as fancy border tiles and accent tiles. Some might also luck into getting cheaper tiles, but generally, we’re in the right ballpark.
The person taking on this project should first figure out how much they are willing to spend and then talk to a reputable tile dealer, who will be happy to explain costs and other factors involved. To get the professional angle on ceramic tile placement, Toolin’ Around spoke with Sal Amabile, tile mechanic for La Moda Ceramic in Westhampton Beach.
First and foremost, Mr. Amabile said one of the most critical factors in putting up wall tile is to use an adhesive specifically for walls. “You need a stronger adhesive for walls than you do for floors,” he said.
A 3½-gallon pail of adhesive, which should be more than enough to cover this job, will cost approximately $30 to $40. Single gallon cans of tile adhesive, which run about $10, are also sold in most large home improvement centers such as Home Depot and Lowe’s.
Keep in mind while shopping that tile professionals are going to have far more knowledge about the requirements and costs of this project.
Mr. Amabile said it’s best to use the top of the kitchen counter as a baseline for setting tiles. He also recommends not taking on more than 2 feet of adhesive spreading at a time.
“You don’t want to get ahead of yourself,” he said, adding that the glue will harden fairly quickly. “You’ll end up scraping the dry adhesive off the wall.”
Project: tile backsplash
Be sure all wall surfaces are thoroughly clean of dust and debris before starting. It’s also a good idea to protect the counter by taping down newspaper.
A notched trowel, which looks like a jagged saw blade on its side, is vital for this project. The teeth will automatically determine how thick the paste should be on the wall.
In most cases, a pre-mixed adhesive will work for wall tiles, however some pre-mixed adhesives won’t work in high moisture areas. Immediately wipe up any adhesive that falls onto the counter.
Start from a corner of the kitchen (or the area for the backsplash), not the middle. Scoop some adhesive on the straight edge of the notched trowel and start spreading it evenly within a 2-foot section. A simple line can be drawn on the wall, roughly 18 inches above the counter, in order to determine where to stop setting tiles.
Using the notched side of the trowel, comb out the adhesive. Hold the trowel at a consistent angle, about 45 degrees, so the top of the adhesive has a uniform height.
Now, set the first tile in a bottom corner of the wall. Push and twist it slightly back and forth so it will set properly into the adhesive. Do not slide the tiles into position.
Set a row of tiles along the top of the counter. Once the first row of tiles is down in that section, start placing rows of tiles above that first line of tile.
Spacing of the tiles is critical at this point. But the distance between the tiles is a matter of taste. Smaller tiles often come on mesh sheets and are already spaced evenly.
To create a uniform look, Mr. Amabile recommends using rubber spacers, especially on heavier, hand-molded tiles, to ensure that they will be set evenly apart and not slide all over the place.
The spacers can sit overnight as the tiles set. However, they must be removed before grouting begins.
Keep in mind that some tiles may have to be cut to accommodate electrical outlets and switch plates. Remember that tiles are fairly thick and it’s important to consider whether an outlet or switch plate is going to sit on top of the tile or is going to be inset into the tile. Measuring for each scenario will have to be considered.
For tile cutting, manual tile cutters can be purchased for around $50. A motorized tile wet saw, which is typically table-mounted, starts at about $100. A sturdy, professional wet saw can run $500 or more but can be rented for the day for around $50.
Mr. Amabile highly recommended the motorized saw over a manual cutter. “A wet saw will give you a professional look ... And save a lot of aggravation,” he said.
Cut tiles often have to fit into tight spaces that make it difficult to trowel the adhesive directly onto the wall. This will require “back buttering” each tile to be set.
To “back butter,” spread the adhesive on the back of the tile with a notched trowel and place it on the wall. If the tile is small, a smaller margin trowel can spread the adhesive.
Once all the tiles are placed, let them set overnight before starting on the next phase of this project.
In the morning, it will be time to grout.
Grout comes in a variety of colors and textures. The choice is yours when it comes to aesthetics, but when there is more space between the tiles, a sand grout should be used to help keep the grout from crumbling, according to Mr. Amabile.
It is also important not to add too much water to the grout mixture, he said. “It should be the consistency of a thick cake batter. The grout should stick to the end of a putty knife.”
If the grout is runny, too much water has been added. Simply add more powdered grout and blend the mixture until the grout thickens. Mix only as much grout as can be applied in 30 minutes.
Now for the last step, simply place the grout between the tiles with a grout float (a soft, flexible spatula or sponge will work too) and then wipe the excess away with a damp (not wet) sponge—a wet sponge can ruin the grout and cause it to crumble later on.
Items needed:
Ceramic tiles
Tile adhesive
Notched trowel
Tile spacers
Tile cutter
Grout
Grout float or spatula
Sponge
More Posts from 


